Teachers have had to speedily adapt to moving from a physical to a digital classroom. Based on student feedback, the most beneficial approach is using a variety of methods; live teacher-student interaction, YouTube tutorials, questions from the textbook or exam papers, screencasts. By developing your own screencasts, your students will have resources that are based on material that is completely relevant to them, and delivered in a familiar style that complements your teaching using the textbook.
It is really worth investing some time every week in building your own library of screencasts or digital tutorials. For the less tech-confident among you, this is a far less daunting task than you may think. Or you may wonder, is it worth the trouble given we should be back in the classrooms in a matter of weeks? However, there is always the possibility of future closures and developing a library of digital tutorials for external use may prove a great timesaver.
What is a screencast?
It’s simply a recording of what is on your screen with a voice-over.
Can I see an example?
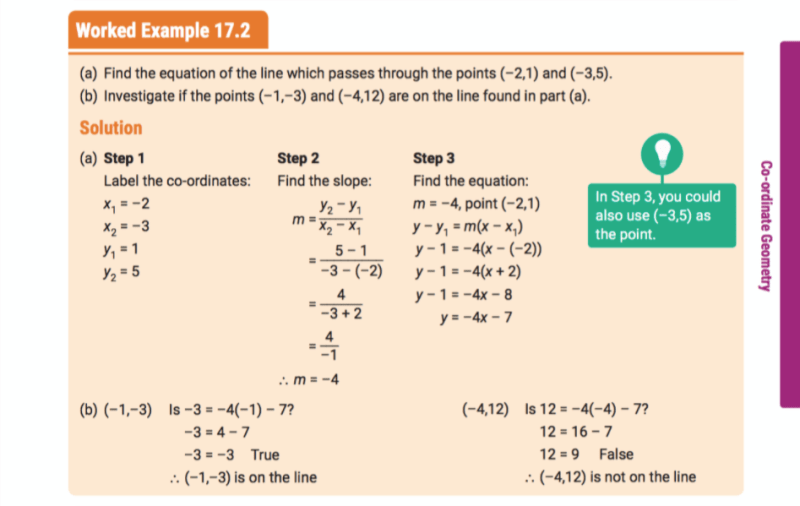
Here is one made for second year Higher Level using Active Maths 2, Chapter 17 Co-ordinate Geometry, p275 Worked Example 17.2.
How did you make this one and how long did it take?
There are multiple different tools to use. For the purposes of this demonstration I photographed the example question from the book using my iPad, cropped it, shared to OneNote where I selected the draw tool and used my interactive pen to write on my iPad. If you are using a laptop, there are various drawing tablets you can use which allow you to write over documents and images. I recorded a meeting in MS Teams and uploaded to YouTube.
To record a meeting in MS Teams:
- Open Calendar and click 'Meet Now'
- A dialog box opens, click 'Join Now'
- In the meeting you will be the only participant. Click 'Share Now' then select OneNote (or whichever application you plan to work on).
- Begin recording by clicking on the three dots icon and selecting 'Start Recording'
- You can finish the call or click ‘Stop Recording’ to end the recording. Within a few minutes, the recording will be sent to you via the chat application.
You can share this recording directly with your students. However if you choose to upload your video to YouTube, you have the option to share with any students you may be dealing with outside of your school organisation. The entire process took less than fifteen minutes.
How should I include it in my lesson?
After you have introduced a topic and done a recap of relevant concepts share the link for your students to watch your worked example. Afterwards, your students can work on the specified questions from the textbook while you offer live support (using an interactive board, or the camera while you work on your board).
Why not deliver the worked example live?
With a pre-recording, students can work at their own pace, pausing the video or re-watching if necessary. This has the added benefit of giving you the opportunity to field questions and pay personalised attention to any student who may need it. It minimises the risk of technology failing at a crucial point. Another disadvantage is if you record a live class with student engagement it raises privacy and data issues.
Would it make sense to record the entire lesson instead?
A standalone demonstration is much easier for the students to use as reference material. It is reusable material for revision purposes or can be distributed to students in subsequent years or other classes. It also a far easier method of collaborating with your colleagues; simply send the link and reference where it is in the textbook. Also, you may inadvertently share your students data as mentioned above if the students interact during your lesson.
Is this simply repeating what is in the book?
The majority of students need additional support and explanation to the examples in the book. Delivering a worked solution allows you to draw attention to common mistakes or misunderstandings, emphasise key points, provide exam tips and suggest alternative methods to solve a similar problem.

Why bother when there are so many maths tutorials already on YouTube?
Developing your own screencasts has a number of benefits; it is completely relevant to the material the students are covering and it complements the textbook. It reinforces the methods you have used in the past. Your students will appreciate your familiar style and delivery.
There is no need to stop using existing YouTube tutorials but never share anything you have not fully reviewed in advance. Quite often the material might be too advanced, not relevant, the strategy used could be strange (even incorrect) and the delivery might be confusing.
This seems like a big investment of time and energy, is it worth it?
There is no need to pre-record demonstrations for every class. Aim to record three or four a week. You will find you get much quicker at them with a little practice and adjust your strategies with different topics. For example, probability questions can become clearer with lots of verbal explanation while sketching a quick graph in OneNote could bring clarity to a complicated algebra problem. As you build up a library of resources you will find you are saving a lot of time. Even in a physical classroom, you can share your worked examples during class time or for homework.
All the editing takes time too.
The demonstrations don’t need to be perfect. If you do make an error, correct it and continue exactly as you would in class. There is no need to begin again unless you accidentally record some sensitive material or student information on your screen.
Which software should I use?
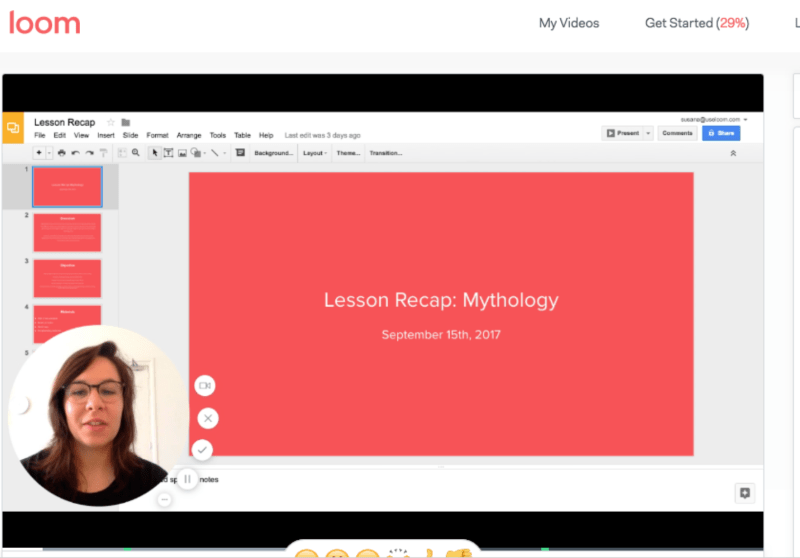
It really depends on what software your school is using to deliver lessons and what devices you are personally using. MS Teams has inbuilt functionality, details can be found here. Google Classroom is integrated with Screencast-O-Matic. There are multiple suitable user-friendly online tools available. If you prefer to work independently of your school’s systems, you could record live on YouTube and share the link with your students. (Do not fear the live recording feature – it allows you to record with your settings private.) Loom offers its full package free to teachers and students. Zoom is free for teachers and has an impressive library of features, to request removal of the time 40-minute time limit, search for K-12 School Time Limit Removal Request FAQ in your browser, and this page will provide you with all the information you need. Screencastify is a good choice for Chromebook users.

Anything else I should know?
- If you choose to upload your work to YouTube it is a good idea to enable comments as you can gather valuable feedback here.
- Adjust your privacy settings to unlisted so anyone with a link can access. Then students can share the resource. Always begin by telling students what page and topic you are on.
- Keep students engaged. Suggest during the demonstration they pause and do the workings themselves.
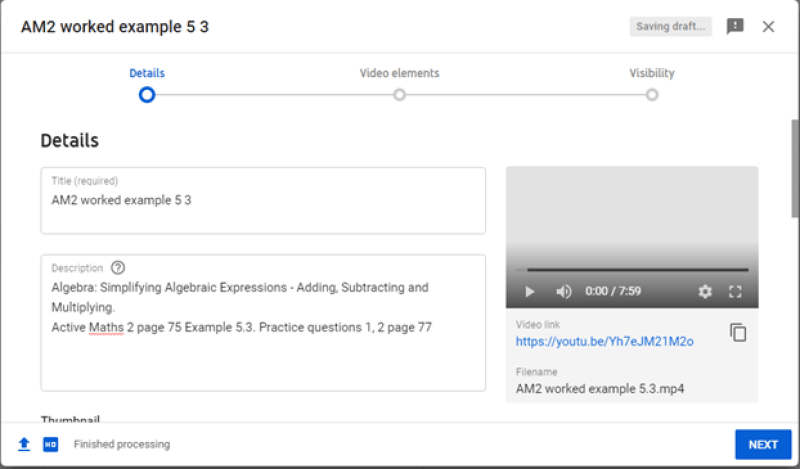
- Align the filenames to the book so you can easily access them later.
- In the file description when uploading to YouTube, use descriptors for topics, list the book, page number and what practice questions it relates to in the textbook.
